
Bon Appetit recently featured some recipes from a Filipina who owns a restaurant featuring homestyle Filipinx dishes.
I immediately lasered in on the oven-roasted chicken and garlic fried rice. Absolutely delicious! We flash-sauteed some spinach in the rice pan once it was clean, right before serving, and having some greens on the plate cuts through the richness of this meal.
Recipes, because you will want them. You can use Worcestershire sauce in place of the Knorr liquid seasoning and Lowry’s instead of Johnnys seasoning. I think the overall chicken dish was a bit too salty, though not bad, so I will probably use a different seasoning blend that has no salt in it next time around and a low-sodium soy sauce.
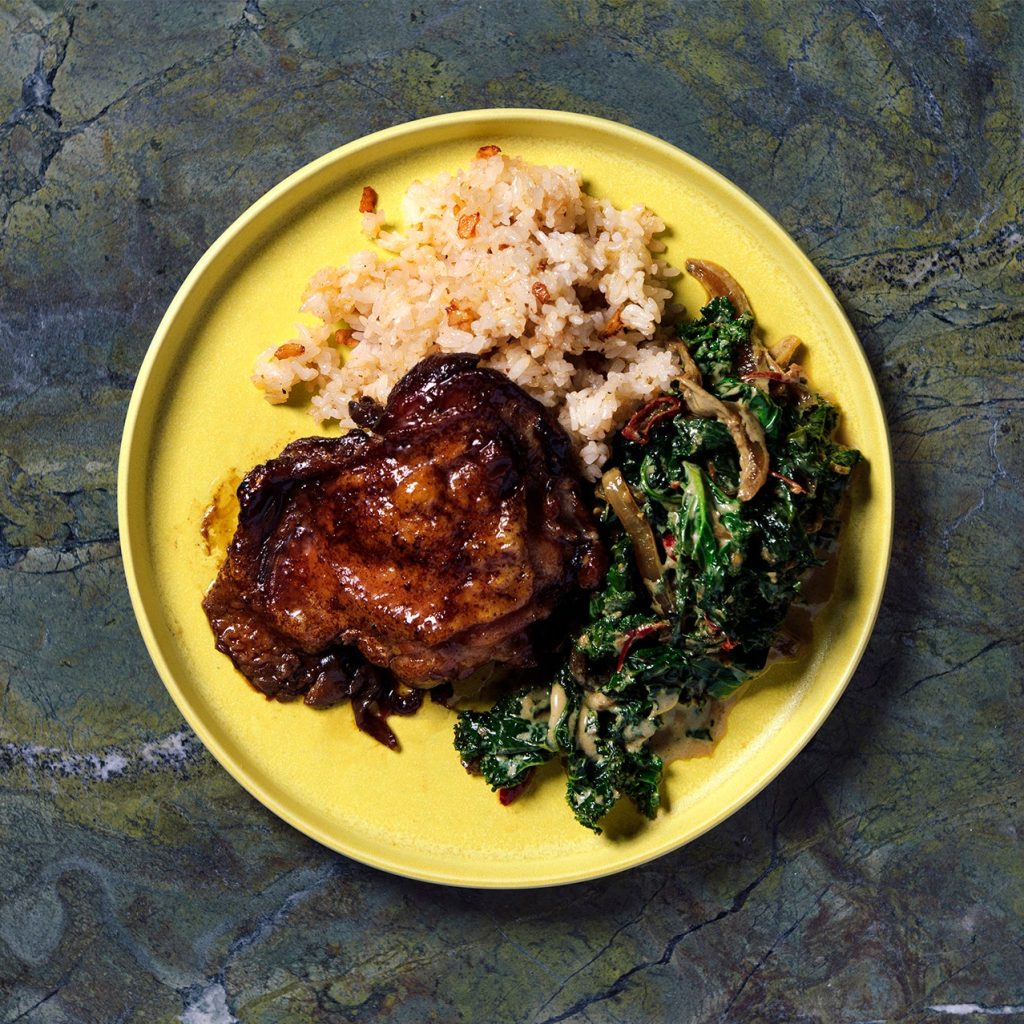
Recipes posted here for convenience are verbatim from these links. Photo from BA!
Oven-Roasted Filipino Chicken Adobo (BA)
4 SERVINGS
In a traditional Filipino chicken adobo, the meat is braised in soy sauce and vinegar until it collapses into slippery submission. This version is from Melissa Miranda, chef-owner of Seattle’s Musang, a Filipinx community space and restaurant. Her adobo is oven-roasted, leading to tender meat on the bottom of the pot as well as crispy skin on the top—“the best of both worlds,” Miranda says. Johnny’s Seasoning Salt, a blend of salt, garlic, pepper, and other spices, is a shortcut for adding flavor to sauces, stir-fries, and meats. Johnny’s is a Pacific Northwest brand, but Lawry’s Seasoning Salt will also do. If you can’t find Knorr liquid seasoning, look for Maggi seasoning instead. Either will add tons of extra umami to the chicken.
6 skin-on, bone-in chicken thighs (about 2½ lb.)
Johnny’s seasoning salt or kosher salt / LJR: Lawry’s seasoned salt is a good substitute
½ tsp. cracked black pepper; plus more freshly ground (optional)
2 Tbsp. vegetable oil
1 small onion, thinly sliced
8 garlic cloves, smashed
½ cup cane vinegar (preferably Datu Puti) / LJR: I used seasoned rice wine vinegar; you could probably substitute any vinegar with a clean, bright flavor
¼ cup soy sauce (preferably Silver Swan)
3 Tbsp. Knorr liquid seasoning / LJR: I used 3 T L&P Worcestershire sauce
3 bay leaves
Preparation
Step 1
Preheat oven to 375°. Pat chicken thighs dry, then season very lightly all over with seasoning salt (or kosher salt and pepper). Heat oil in a large skillet over medium-high. Arrange chicken, skin side down, in pan and cook until deeply browned underneath, 8–10 minutes. Turn chicken over and cook until lightly browned on the other side, about 3 minutes. Transfer to a roasting dish just large enough to fit chicken in a single layer and arrange skin side up; set aside.* Pour out and discard all but 2 Tbsp. chicken fat from the pan.
*LJR: I set the browned chicken on a plate to the side, continued on through Step 2’s cooking of the vegetables, then nestled the chicken back into the Dutch oven I was using for Step 1 so it held everything for cooking as well as 1 & 2.
Step 2
Set skillet over medium heat. Add onion and garlic and cook, stirring occasionally, until garlic is golden and onion is translucent, about 3 minutes. Add vinegar, scraping up any browned bits stuck to bottom of skillet with a wooden spoon, then add soy sauce, liquid seasoning, bay leaves, ½ tsp. cracked pepper, and ½ cup water. Bring to a simmer, then remove from heat and pour over reserved chicken in baking dish (chicken should be mostly covered with only skin left exposed).
Step 3
Bake chicken, adding a splash or so of water if dish is looking dry at any point, until meat is almost falling off the bone, 60–75 minutes.
Step 4
Divide rice among plates and nestle chicken thighs alongside, dividing evenly. Serve with laing.
Ingredients for Garlic Fried Rice (BA)
4 SERVINGS
¼ cup vegetable oil
8 garlic cloves, finely chopped
4cups cooled cooked jasmine rice
Johnny’s seasoning salt or kosher salt
Freshly ground black pepper (optional)
Preparation
Step 1
Heat oil in a large wok or nonstick skillet over medium-high. Cook garlic, stirring, until golden brown, about 1 minute. Using a spider or slotted spoon, transfer garlic to a small plate. (Or strain through a fine-mesh sieve into a heatproof measuring glass and return oil to wok.)
Step 2
Break up rice and place in same skillet; season lightly with seasoning salt (or kosher salt and pepper). Cook, tossing occasionally, until rice is warmed through and crispy in spots. (In Tagalog that crispy rice is called tutong; it’s like the crispy part at the bottom of the paella pan.) Add garlic to rice and toss to combine.
My tweaks:
– As noted in the chicken recipe under Step 1, I did all of the stovetop work in my large Dutch oven, pulled the chicken out & drained most of the fat, cooked the vegetables and seasoning liquid as directed in Step 2, then added the chicken back into the pot to cook.
– We fried the rice in two batches, splitting the rice and garlic and oil 50/50 between the two batches.
– I struggled to get any real crunch on the rice, but it sat on a warm burner at the back of the stove for a few minutes while we got things ready to eat, and some parts got deliciously crunchy. I will experiment in ways to get the crunch, because it would be worth it!
Bonus: Quick Sautéed Spinach (RameyLady)
1 bag of baby spinach (for 4 people), 2 bags for 5-8
1-2 T oil
1-3 cloves of garlic, chopped
A bit of salt & fresh pepper, to taste
Preparation
In a wide non-stick skillet or wok, pour in a T or two of oil (whatever) over medium-high heat till it barely starts to shimmer. Add the garlic and stir for about 30 seconds, just to get some flavors released. Add a bag of pre-washed baby spinach — add two bags if you’re feeding more than 4-5 people. Quickly toss the spinach in the hot pan using thongs until it wilts, turns bright green, and is glossy with oil. Remove immediately from the heat (but I leave it in the pan so it doesn’t get cold). Season lightly with some salt and pepper and serve ASAP. Do not let this sit – it’s better to flash-sautee the spinach just as you’re ready to eat.
Bonus: If you have time and desire, before starting the spinach, make a quick breadcrumb topping — throw some butter in your hot skillet. When it’s hot and foamy, add 1 cup of breadcrumbs (literally any type), a pinch of salt, any dried Italian herb you like, and a twist of pepper. Toss around in the pan over medium-high heat till the breadcrumbs start to get toasty. Pour into a bowl and keep warm, then start doing the spinach recipe as listed above. At the “salt & pepper” step at the end, toss the breadcrumbs instead. Crunchy!

Got a comment?